> ## Documentation Index
> Fetch the complete documentation index at: https://docs.chipmunktheme.com/llms.txt
> Use this file to discover all available pages before exploring further.
# How to Add a AWeber Form to a Chipmunk Theme Website
> Learn how to add a AWeber form to your Chipmunk Theme website. This tutorial will guide you through the process step by step.
[AWeber](https://aweber.com) is a third-party newsletter platform that many store owners use to keep their customers up to date.
Normally, AWeber uses an embedded HTML form to collect email signups for your newsletter campaigns. We provide AWeber support out of the box and you only need to enter your unique **form action URL** to enable your customers to submit their email addresses. You can do this on the `Customize` page of your WordPress admin.
## 1. Get the form action URL
1. [Log in](https://aweber.com/) to AWeber’s admin panel and navigate to the list you’d like to subscribe your users to.
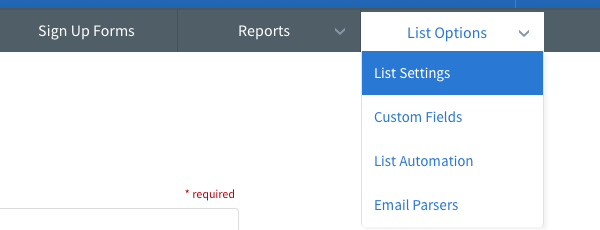
2. Hover over the List Options tab and select List Settings.
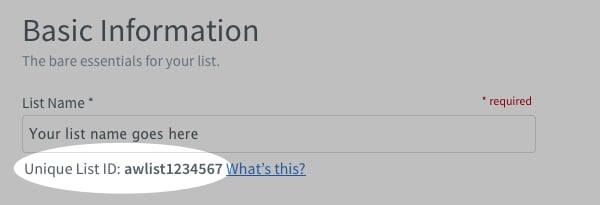
 3. Under Basic Information you can find the Unique List ID shown under the List Name.
 ## 2. Prepare the Form action URL
The form action URL for AWeber should contain the base part required by the provider, but also the unique list ID.
A correct URL should look like that (make sure to update the List ID with your unique ID found in the previous step):
```
https://www.aweber.com/scripts/addlead.pl?listname=awlist1234567
```
## 3. Use the URL in Chipmunk Theme
1. From your WordPress panel, go to `Appearance` > `Customize`.
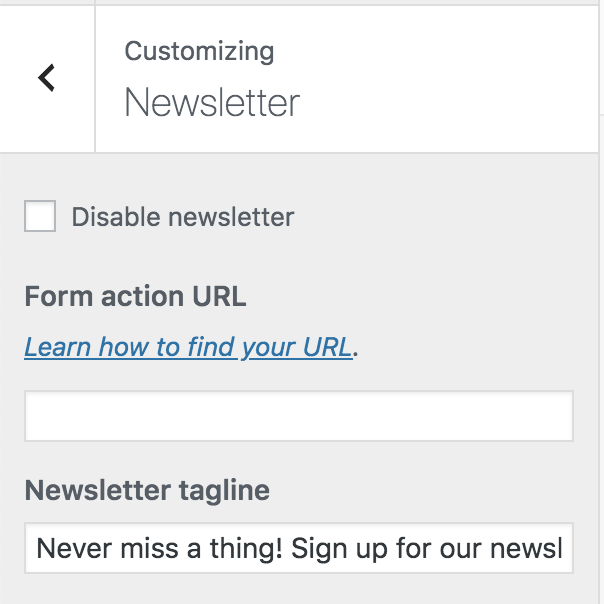
2. In the left panel, click **Newsletter**.
3. Find the box to enter your form action URL.
4. Paste the URL that you copied into the **Form action URL** box by pressing `ctrl + V` on a PC or `cmd + V` on a Mac.
5. Publish the changes.
## 2. Prepare the Form action URL
The form action URL for AWeber should contain the base part required by the provider, but also the unique list ID.
A correct URL should look like that (make sure to update the List ID with your unique ID found in the previous step):
```
https://www.aweber.com/scripts/addlead.pl?listname=awlist1234567
```
## 3. Use the URL in Chipmunk Theme
1. From your WordPress panel, go to `Appearance` > `Customize`.
2. In the left panel, click **Newsletter**.
3. Find the box to enter your form action URL.
4. Paste the URL that you copied into the **Form action URL** box by pressing `ctrl + V` on a PC or `cmd + V` on a Mac.
5. Publish the changes.